


Зміст:
| Ремонт амортизатора: покрокове керівництво |
| Як перевірити працездатність амортизатора |
| Техніка безпеки при проведенні ремонтних робіт |
Ремонт амортизатора в гаражних умовах зазвичай не приводить до бажаного результату. Однак існують поломки, усунути які можна і власноруч. Про них, власне, ми сьогодні і поговоримо.

Найбільш слабким вузлом газомасляних амортизаторів є сальник штока, при зносі якого відбувається витік масла з пристрою. Це призводить до погіршення характеристик амортизатора аж до повної втрати його ефективності. Щоб цього не сталося, пропонуємо Вашій увазі покрокове керівництво по ремонту даної деталі. Тож, почнімо:
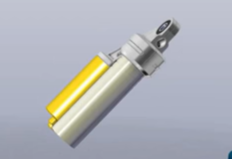
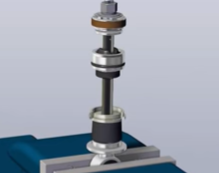
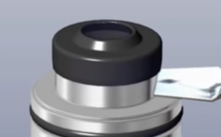
КРОК 1. Випуск газу з резервуара
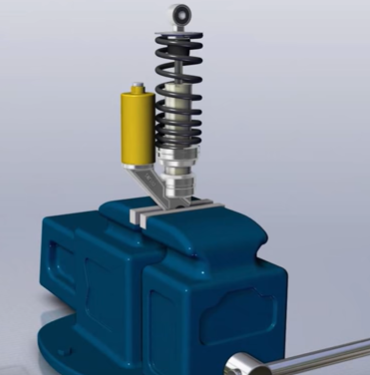 |
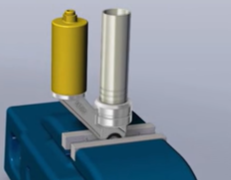
Закріпити амортизатор в лещатах. Для захисту корпусу від пошкоджень можна затискати через тканину. |
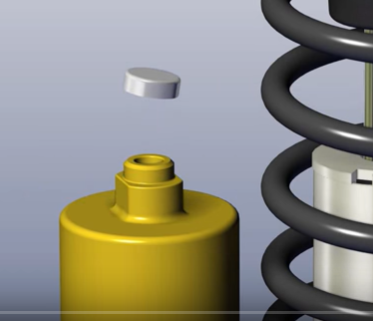 |
Підчепити захисну кришку плоскою викруткою. |
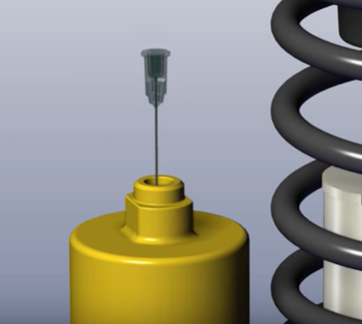 |
ОБЕРЕЖНО пробиваючи медичною голкою гумову прокладку, спустити весь закачаний газ із резервуара. |
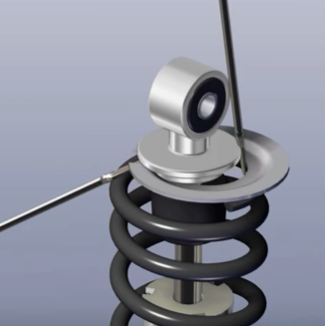 |
За допомогою двох великих викруток БЕРЕЖЛИВО відігнути пружину і витягти скобу. |
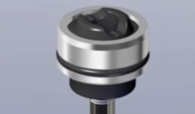
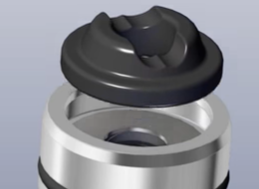
КРОК 2. Зняття кришки і витяг штока
 |
Закріпити амортизатор в лещатах. Для захисту корпусу від пошкоджень можна затискати через тканину. |
 |
Підчепити захисну кришку плоскою викруткою. |
 |
Далі, використовуючи тонку викрутку або пінцет, слід акуратно витягнути стопорне кільце. |
|
Без сильних рухів потрібно вибити шток з корпусу амортизатора. |
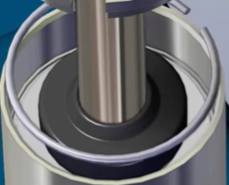
КРОК 3. Зливання масла і промивка корпусу.
 |
Акуратно перевернути корпус і злити масло. |
 |
Потім слід ретельно промити внутрішню частину корпусу гасом і витерти чистою ганчіркою. |
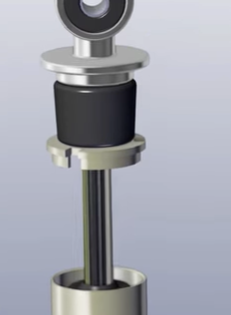
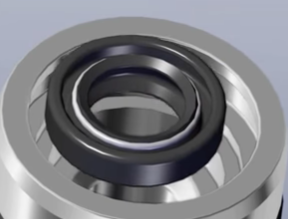
КРОК 4. Зняття держателя сальника.
 |
Зафіксувати збірку штока в лещатах. |
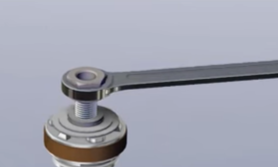 |
Відвернути накидним ключем гайку штока. |
 |
Зняти з штока поршень з набором шайб, запам'ятовуючи послідовність їх розташування. Для зручності через весь набір можна протягнути пластиковий хомут або провід, що запобіжить перестановці шайб між собою. |
 |
Акуратно зняти тримач сальника. |
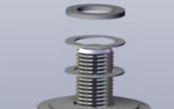
КРОК 5. Ремонт / заміна старого сальника на новий
 |
Спочатку потрібно ДУЖЕ ОБЕРЕЖНО зняти пильовик, піддягаючи його викруткою знизу по контуру, для ретельного очищення і промивання гасом. |
 |
При наявності будь-яких пошкоджень на гумовому кільці потрібно замінити його на нове аналогічне маслостійке кільце. |
 |
Далі слід витягнути гумову прокладку, стиснувши її пальцями, і витягти металеву шайбу. |
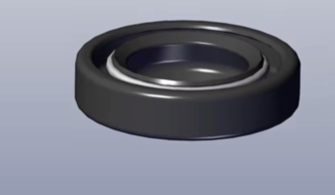 |
Витягти розрізну шайбу і сальник. Примітка. У разі відсутності будь-яких ушкоджень – після очищення можна повернути деталь на попереднє місце. В зворотньому випадку – здійснити заміну. |
ВАЖЛИВО! Після заміни несправної запчастини амортизатора в обов'язковому порядку перевірте стан всієї підвіски.
Як перевірити працездатність амортизатора
Існує два способи перевірити амортизатор на працездатність: перший - візуальний (не знімаючи його з автомобіля), другий - детальний (ретельна перевірка з демонтажем).

Перший варіант передбачає простий огляд пристрою та проведення мінімальних маніпуляцій для перевірки амортизатора (наприклад, достатньо всього лише кілька разів натиснути на крило або бампер авто, щоб визначити несправність амортизатора).
При другому ж здійснюється наступний порядок дій:
- демонтується амортизатор;
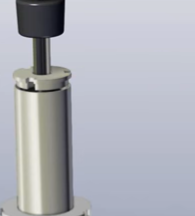
- виймається шток амортизатора, утримується знятий пристрій в монтажному положенні.
Примітка. Шток стійки повинен переміщуватися по всій довжині ходу однаково рівно і без ривків; - оглядається поверхня штока на предмет будь-яких ушкоджень, викривлень;
- перевіряється стан і посадка ущільнюючих гумових пробок амортизатора. Вони повинні міцно сидіти в монтажних отворах, не мати тріщин або пошкоджень.
Примітка. Пошкоджені гумові пробки можуть бути причиною появи стуків під час руху.
Важливо! Амортизатор вважається справним, якщо сліди протікання амортизаційної рідини знаходяться в межах між верхнім кільцем ущільнювача штока і нижньою чашкою пружини.
Перебіг рідини в незначній кількості має навіть позитивний ефект, так як відбувається змазування кільця ущільнювача, що збільшує термін його експлуатації.
Техніка безпеки при проведенні ремонтних робіт

Щоб ремонт пройшов максимально результативно і, що найважливіше – безпечно, варто дотримуватися наступних правил:
- Проводьте технічне обслуговування в приміщенні з хорошим освітленням і вентиляцією;
- Не паліть і не використовуйте відкритий вогонь в приміщенні, де здійснюється ремонт;
- Використовуйте рукавички при роботі і захисні окуляри при огляді «низа» автомобіля
- Захищайте відкриті ділянки шкіри від потрапляння масел (особливо відпрацьованих). У разі потрапляння – скористайтесь мильним розчином якомога швидше;
- Заборонено користуватися бензином, дизельним паливом і розчинниками для очищення рук;
- Якщо потрібно здійснити підйом автомобіля – звільніть багажник від непотрібних предметів.
Робити ремонт амортизатора самостійно або ж звертатися в автомайстерню – вирішуйте самі. У тому чи іншому випадку, Вам знадобляться якісні запчастини. У нашому інтернет-магазині Ви можете купити амортизатори та інші оригінальні запчастини з офіційною гарантією від виробника. Здійснюйте вибір самостійно, скориставшись зручним фільтром, або ж звертайтеся до експертів Vnedorognik.ua, які з радістю дадуть відповідь на всі Ваші запитання.


 198
198
 20хв
20хв 


